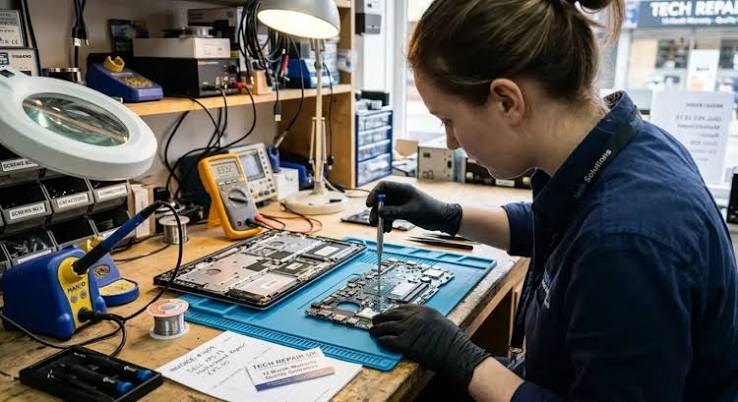
Motherboard repair remains one of the most technical yet rewarding aspects of computer maintenance. As the central hub connecting the CPU, RAM, storage, graphics card, and peripherals, a failing motherboard can bring an entire system to a halt. Understanding how to diagnose and address motherboard issues not only saves money but also extends the life of valuable hardware. This guide draws on established repair practices used by technicians and experienced DIYers to help you approach motherboard problems with clarity and safety.
Recognizing the Signs of Motherboard Trouble
Motherboard failures rarely announce themselves with a single clear error. Instead, they often present through a combination of symptoms that can mimic other component problems. Common indicators include the computer failing to power on at all, repeated random restarts or freezes, no display output despite working peripherals, unusual beeping patterns during POST (Power-On Self-Test), or the system recognizing only some of the installed RAM or storage devices.
Overheating around the chipset or VRM (Voltage Regulator Module) area, visible bulging or leaking capacitors, and burn marks near power connectors are more definitive physical signs. In many cases, these issues stem from power surges, poor cooling, dust accumulation, or simply age-related degradation of solder joints and capacitors. Distinguishing motherboard problems from a faulty PSU, CPU, or RAM requires systematic isolation testing—something every serious repair attempt should begin with.
Essential Tools and Safety Measures
Before opening a case, gather the right tools and follow strict safety protocols. You will need a multimeter for continuity and voltage checks, thermal paste for reseating the CPU if required, isopropyl alcohol (90% or higher) and soft brushes for cleaning, a set of precision screwdrivers, anti-static wrist strap, and ideally a known-good power supply for testing. For more advanced work, a soldering iron with fine tips, flux, and replacement capacitors or MOSFETs become necessary.
Always power down the system, unplug it, and discharge residual electricity by holding the power button for 30 seconds. Work on a non-conductive surface and ground yourself to prevent electrostatic discharge, which can instantly destroy sensitive components. Never attempt repairs while the board is still mounted if heat or liquid damage is suspected—remove it carefully after documenting all cable connections with photos.
Diagnosing Motherboard Problems Systematically
Start with the simplest checks. Confirm the power supply is delivering correct voltages on the 24-pin ATX and 8-pin EPS connectors using a multimeter or a power supply tester. Reseat the CPU, RAM modules, and any expansion cards. Clear the CMOS by removing the battery for several minutes or using the jumper method. Test with minimal hardware: one stick of RAM in the primary slot, onboard graphics if available, and no additional drives or cards.
If the system still fails to POST, listen carefully to beep codes or consult the motherboard manual for diagnostic LED patterns. Many modern boards feature onboard debug LEDs that indicate CPU, DRAM, VGA, or boot-device problems. Visual inspection under good lighting often reveals the culprit—swollen capacitors, cracked solder joints around the CPU socket, or corrosion from liquid spills.
When basic steps fail, more advanced diagnosis may involve checking continuity on power rails, measuring resistance across coils, or using a thermal camera to identify shorted components that heat up immediately on power application. These techniques require experience and should only be attempted by those comfortable with electronics.
Practical Motherboard Repair Approaches
Not every motherboard failure requires full replacement. Capacitor replacement is one of the most common successful repairs. Faulty electrolytic capacitors on the VRM or near the chipset can cause instability or failure to boot. Desoldering the old parts, cleaning the pads thoroughly, and installing high-quality low-ESR replacements of matching capacitance and voltage rating often restores full functionality.
Solder joint repairs around the CPU socket or PCIe slots address issues caused by thermal cycling over years of use. Reflowing with controlled heat or, in skilled hands, reballing BGA chips can revive boards that otherwise seem dead. Cleaning corrosion from liquid damage with isopropyl alcohol and a soft brush, followed by thorough drying, has saved many systems when addressed quickly.
For bent CPU socket pins (especially on older LGA or PGA designs), careful straightening with a mechanical pencil or specialized tools can restore contact. However, this carries high risk of further damage. BIOS chip failures sometimes respond to external programming if the correct firmware file and tools are available, though this is advanced territory.
Knowing When Professional Service Is the Better Choice
Complex BGA rework, multi-layer board damage, or issues involving the Southbridge/Northbridge (on older platforms) or modern Platform Controller Hub often exceed typical DIY capability. Professional repair shops equipped with infrared rework stations, ultrasonic cleaners, and component-level diagnostic tools can succeed where home efforts fail. Weigh the cost of professional service against the price of a replacement motherboard—especially for older systems where compatible boards may be scarce or expensive.
Warranty considerations also matter. Opening the case or performing soldering usually voids remaining manufacturer coverage. For systems still under warranty, contact the manufacturer or system builder first.
Preventing Motherboard Failures Before They Start
Prevention remains far more effective than repair. Maintain good airflow with clean case fans and regular dust removal. Use a quality surge protector or, better, an uninterruptible power supply. Avoid overclocking beyond stable, well-cooled limits. Ensure the CPU cooler is properly mounted with fresh thermal paste and that the case has adequate ventilation. Keep liquids far from the system and monitor temperatures with reliable software.
When upgrading components, verify compatibility with the motherboard’s supported CPU list, memory speeds, and power delivery capabilities. A mismatched or underpowered VRM under heavy load accelerates component wear.
Balancing Repair Costs Against Replacement
Motherboard repair costs vary widely. Simple capacitor work or cleaning may run modest fees at a local shop, while advanced BGA or multi-component repairs can approach or exceed the price of a new board. Factor in labor time, parts availability, and the age of the system. For recent high-end boards, professional repair often makes economic sense. For budget or older platforms, replacement frequently proves more practical and reliable.
Motherboard repair rewards careful diagnosis, respect for electrostatic risks, and realistic assessment of one’s skill level. By combining methodical troubleshooting with proven repair techniques and strong preventive habits, many systems can be restored to reliable service—preserving both performance and investment without unnecessary full hardware replacement.



One thought on “Motherboard Repair Guide: Diagnose, Fix & Prevent Issues”