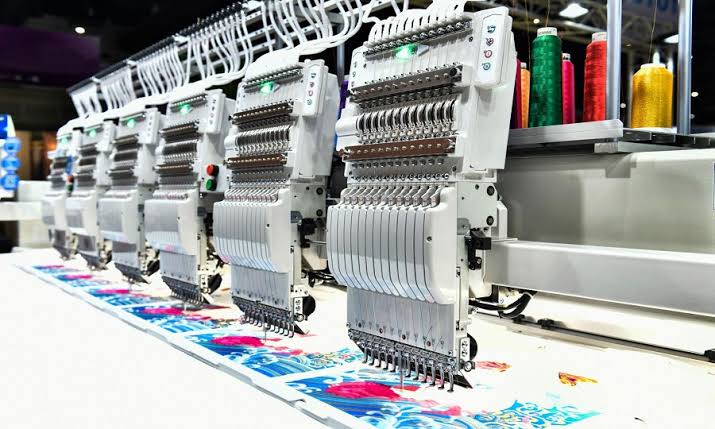
An embroidery machine transforms plain fabric into personalized masterpieces with precision and speed. Whether you are a hobbyist creating custom gifts or a small business owner producing branded apparel, the right embroidery machine opens endless creative possibilities. This guide covers everything you need to know—from types and key features to selection tips and maintenance—so you can invest wisely and achieve professional results.
What Is an Embroidery Machine?
An embroidery machine is a specialized sewing device that automatically stitches pre-programmed digital designs onto fabric using a computerized system. Unlike traditional free-motion embroidery, modern machines move the fabric in precise X and Y directions while the needle creates running stitches, satin stitches, and fill (tatami) stitches. Most home and commercial models are computerized, allowing users to load designs via USB, Wi-Fi, or built-in libraries.
These machines range from compact single-needle units for home use to multi-needle industrial systems for high-volume production. Popular applications include monogramming clothing, decorating towels and bags, creating patches, and adding logos to promotional items. With the growing demand for personalization, an embroidery machine has become an essential tool for crafters and entrepreneurs alike.
Types of Embroidery Machines
Understanding the main categories helps match a machine to your needs and budget.
Single-needle embroidery machines are the most common starting point. You manually change thread colors for multi-color designs. They are affordable, compact, and ideal for beginners or low-volume projects. Many offer embroidery fields of 4×4 inches or 5×7 inches and stitch speeds around 400–850 stitches per minute (SPM).
Combination sewing and embroidery machines handle both regular sewing and embroidery. Models like popular Brother SE series units provide versatility if you also construct garments or do general sewing. The trade-off is sometimes a smaller embroidery area compared to dedicated machines at the same price.
Multi-needle embroidery machines (typically 4–15 needles) automatically switch colors, dramatically increasing productivity. These suit small businesses or serious hobbyists who produce multi-color designs frequently. Speeds often exceed 1,000 SPM, and larger hoop sizes support bigger projects such as jacket backs. They require more space and investment but reduce labor significantly.
Dedicated embroidery-only machines focus solely on stitching designs and often deliver larger fields and specialized features for the price.
Key Features to Look for in an Embroidery Machine
Hoop size (embroidery field) is the most critical specification. A 4×4-inch field limits you to small monograms and patches. A 5×7-inch area covers most hobby projects like shirt fronts and tote bags. Larger fields (6×10 inches and beyond) allow jacket backs, quilt blocks, and complex multi-part designs without frequent rehooping. Always check the actual stitchable area, as it is slightly smaller than the labeled hoop size.
Speed, measured in stitches per minute, affects project completion time. Entry-level machines run 350–650 SPM, while mid-range and commercial units reach 800–1,200 SPM. Stability at higher speeds matters more than the maximum number.
Connectivity options such as USB ports or wireless transfer make loading custom designs easy. Built-in design libraries and fonts provide immediate inspiration, while on-screen editing (resize, rotate, combine) adds flexibility. Automatic needle threaders, thread cutters (especially for jump stitches), and clear color touchscreens improve usability.
Other practical considerations include the number of included hoops, throat space for bulky items, and brand support for software compatibility (formats like PES, DST, JEF, or ART). Reputable brands such as Brother, Janome, Bernina, and Baby Lock offer strong dealer networks and reliable parts availability.
How to Choose the Right Embroidery Machine
Beginners should prioritize ease of use and a 5×7-inch hoop. Look for intuitive interfaces, automatic threading, and a good selection of built-in designs. A combination machine works well if you also sew regularly and have limited space. Test machines in person if possible, or choose models with strong user communities and local dealer support.
Hobbyists who embroider frequently benefit from dedicated single-needle machines with larger fields and better editing tools. If you plan to sell items or handle multi-color designs often, consider an entry-level multi-needle machine for efficiency.
Business users need durability, high speed, automatic color changes, and larger embroidery areas. Factor in long-term costs for stabilizers, threads, needles, and software. Match the machine to your typical project size and volume rather than chasing the highest specs.
Budget ranges typically start under $1,000 for solid entry-level options and climb into the thousands for advanced or multi-needle models. Always verify warranty terms and available training resources.
Essential Setup Tips and Accessories for Success
Successful embroidery depends as much on preparation as on the machine. Choose the correct stabilizer: cut-away for knits and dense designs, tear-away for stable wovens, and water-soluble for lace or sheer fabrics. Use embroidery-specific needles (often 75/11) matched to fabric weight, and quality polyester or rayon thread designed for machine use.
Proper hooping keeps fabric taut without distortion. Magnetic hoops can reduce hoop burn and speed up the process. Always test designs on scrap fabric with the same stabilizer and thread combination. Prewash garments that may shrink, and mark placement carefully.
Invest in basic supplies: extra bobbins, a variety of stabilizers, embroidery scissors, and design software or access to reputable design marketplaces. Learning proper tension adjustment and needle changes prevents common issues like thread breaks or puckering.
Maintenance for Long-Term Performance
Regular care keeps your embroidery machine running smoothly. Clean the bobbin area and needle plate after every few projects to remove lint. Oil according to the manufacturer’s guidelines (many modern machines require minimal oiling). Change needles frequently—especially after dense designs or heavy fabrics—and store the machine covered in a stable environment.
Schedule professional servicing periodically, particularly for multi-needle units. Following these practices extends the machine’s life and maintains stitch quality.
Conclusion: Start Creating with Confidence
Selecting the right embroidery machine comes down to matching hoop size, speed, automation level, and budget to your projects and goals. Whether you begin with a user-friendly single-needle or combination model or invest in a multi-needle system for production, modern embroidery machines deliver consistent, professional results that elevate any fabric project.
With the right machine, stabilizers, and techniques, you can personalize clothing, create unique home décor, or build a profitable custom embroidery business. Research current models from trusted brands, consider your most common projects, and choose a machine that grows with your skills. Your next embroidered creation is only a design file and a few stitches away.



One thought on “The Complete Guide to Choosing the Best Embroidery Machine”